
Inkscape PDF Generator
- What is it?
- How do I install it?
- How do I enter the license?
- Setting up your Inkscape file
- Exporting as a single PDF
- Advanced topics
- Example SVG Templates (click to download)
- How to report a bug
What is it?
While working on our PDF patterns we have also been developing tools to make creating patterns easier and faster. This is the first tool that is ready to be released to the public.
Inkscape is a great program for creating sewing patterns but it has one major limitation; You can only export a single page as a PDF. Inkscape PDF Generator from Titchy Threads is a program that you run on your computer to automatically export a multi-page PDF pattern from Inkscape. There are just a few simple things you need to set up in your SVG file first - they are detailed in this tutorial below.
It is currently only available for Microsoft Windows (Vista, 7 and 8). It will also work on Windows XP if you first install the .NET 2.0 Runtimes.
How do I install it?
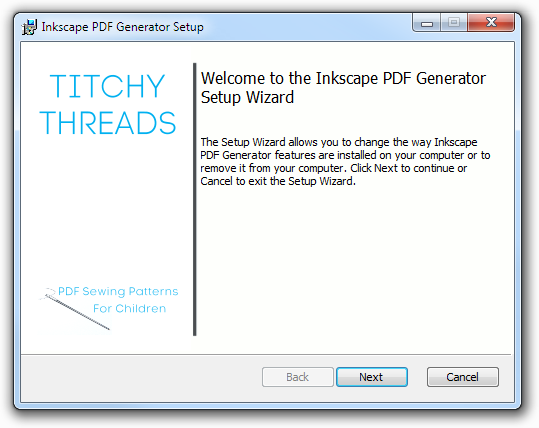
First you need to purchase it from Titchy Threads. You can then download and install it from our website. The download file is a Windows installer file (.MSI). Double-click on the file and follow the prompts. You may need to accept a security warning. Once the installer runs, just click Next and then Install.
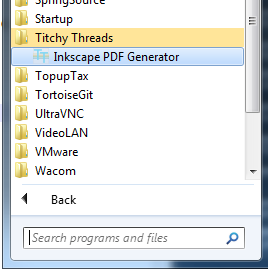
Once installed you can launch the program from the Start Menu.
How do I enter the license?
Regardless of which license you bought the installer is the same. When you start the program for the first time, you will be prompted with this window:
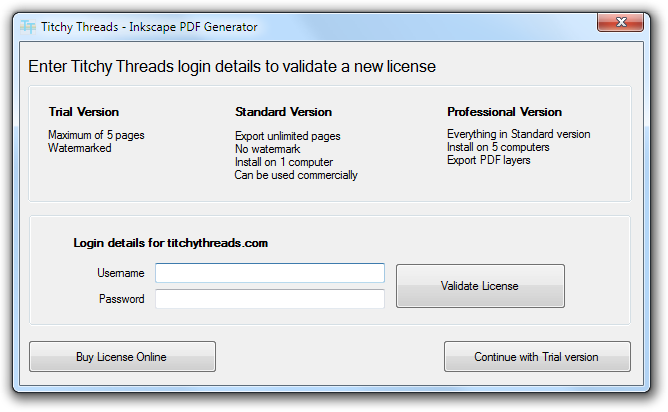
If you are just using the trial version, click Continue with Trial version. If you have bought one of the other licenses then simply enter your titchythreads.com username and password and click Validate License. This will check online with our servers which license you own. Note that the password is securely protected before sending to the server and will not be stored locally on your machine.
If you upgrade your license, you can open the Validate License window from the Help menu. Re-enter your username and password and it will re-validate your license with the server. The enhanced functionality for the new license will be automatically enabled.
Setting up your Inkscape file
The program itself is very simple to use, but there is a little bit of work to do first to setup the SVG file so that it knows where each page is. This only needs to be done once. Some example files that you can use as a basis have also been included.
Step 1 - Set Document Properties
Create a new Inkscape file. You need to set the page size to the size you want each PDF page to be. Do this by selecting File | Document Properties:
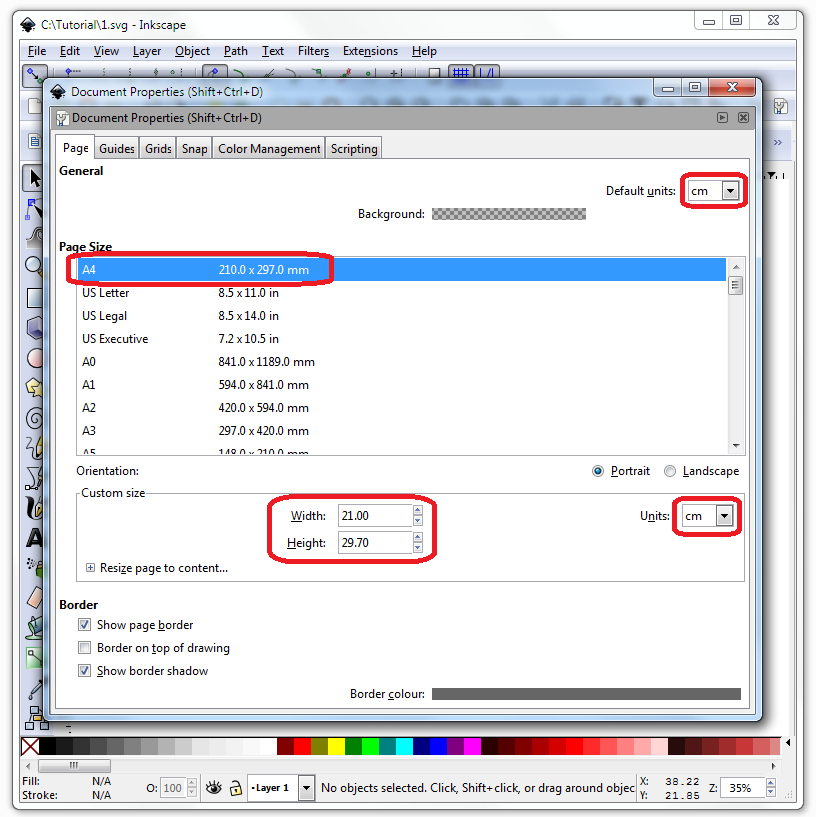
A4 is narrower but longer than US Letter size. Your pattern can work in either by adding an inner border. We will do this in a later step.
Set the Default Units and the Units to your preferred units. Make a note of the Width and Height - you will need this in the next step.
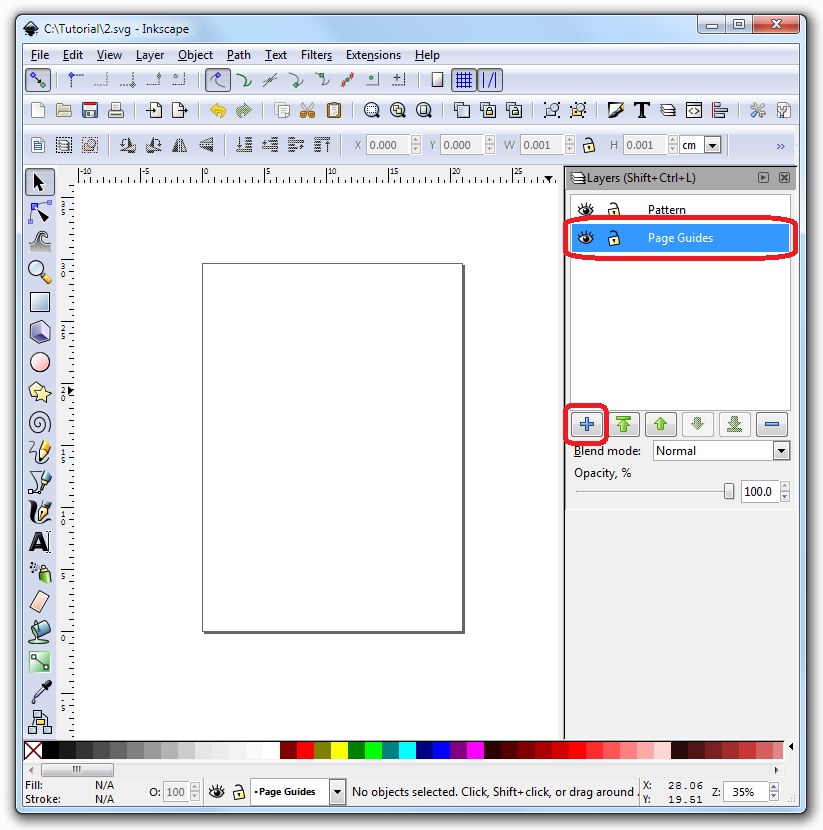
Step 2 - Create Layers
You need to setup different layers in your Inkscape file. To open the Layers window, press Ctrl + Shift + L.
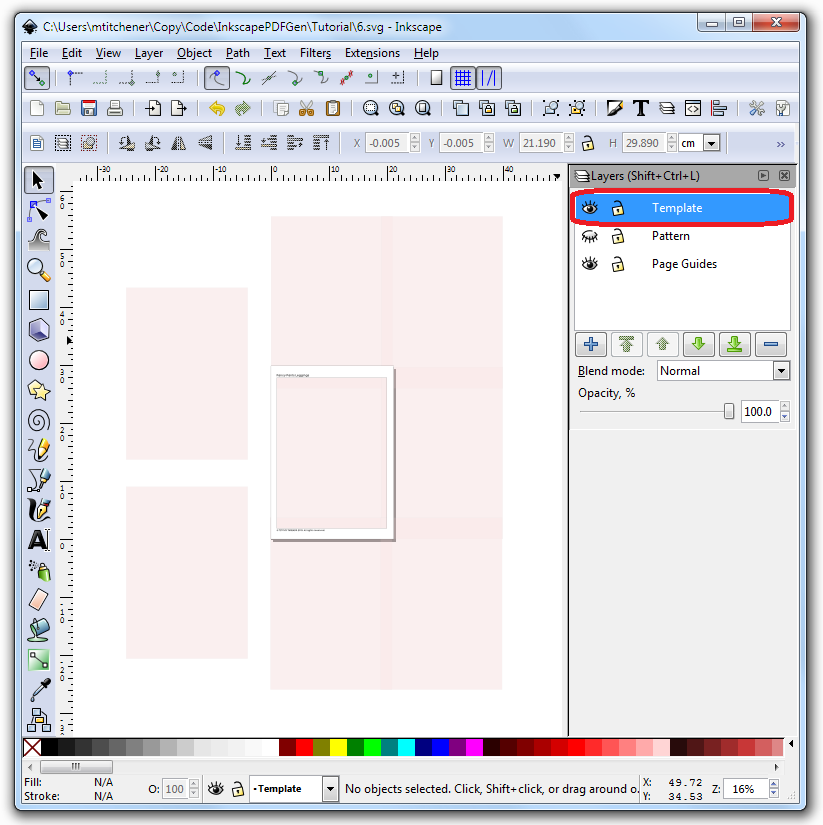
Create layers called: Pattern and Page Guides. You want Page Guides to be below Pattern. There are other layers that you can create for advanced features - we'll discuss those later. For now, select the Page Guides layer - we will need that first.
Step 3 - Create First Page Guide
The program needs to know where on the overall pattern you want to export each page. To do this you create special rectangles that won't be visible in the final PDF. They don't actually need to be on this specific layer, but it makes things easier to be able to hide them when editing your pattern.
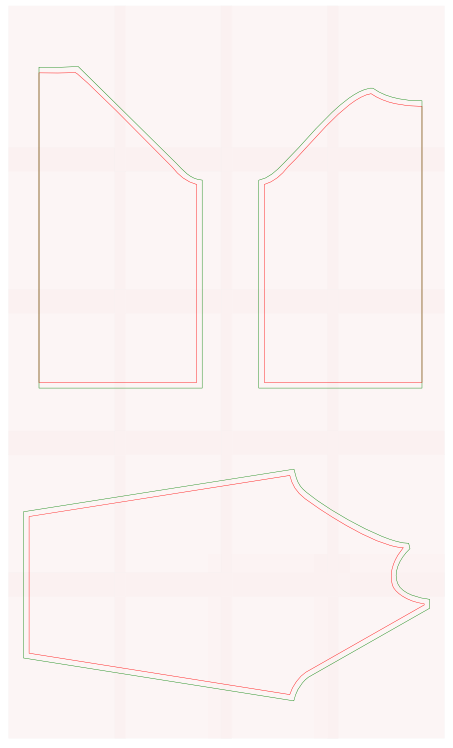
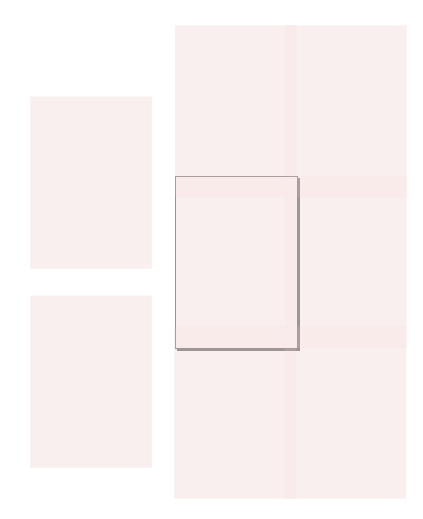
To show you what we are aiming to create, see the example pattern below. Each of the pink rectangles is a page guide. This tells the program where to export a page from. Each one is the exact size of a page. Note that they overlap slightly to allow for the border on the page. Any part of the pattern covered by page guide 01 will be exported on page 1 of the PDF, anything covered by page guide 02 will be exported on page 2, etc.
Note: The pages are exported in alphabetical order, so you should use a leading zero on the page number if you have more than 9 pages - otherwise they will not come out in the correct order.
The program knows that an object is a page guide based on its ID - but we'll set that in a moment. First create a rectangle on the Page Guides layer.
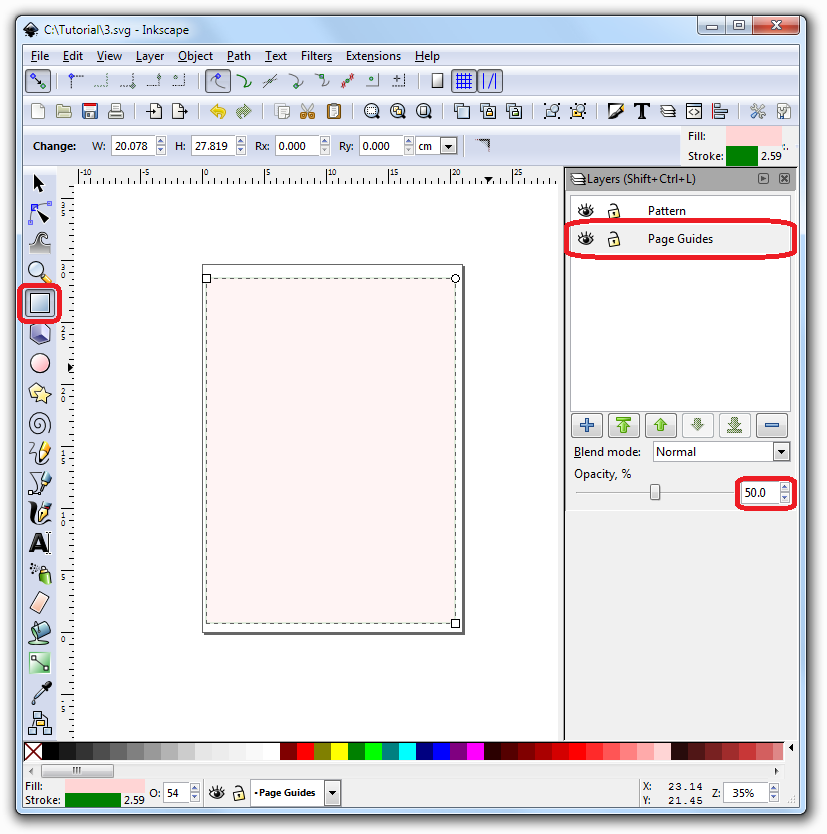
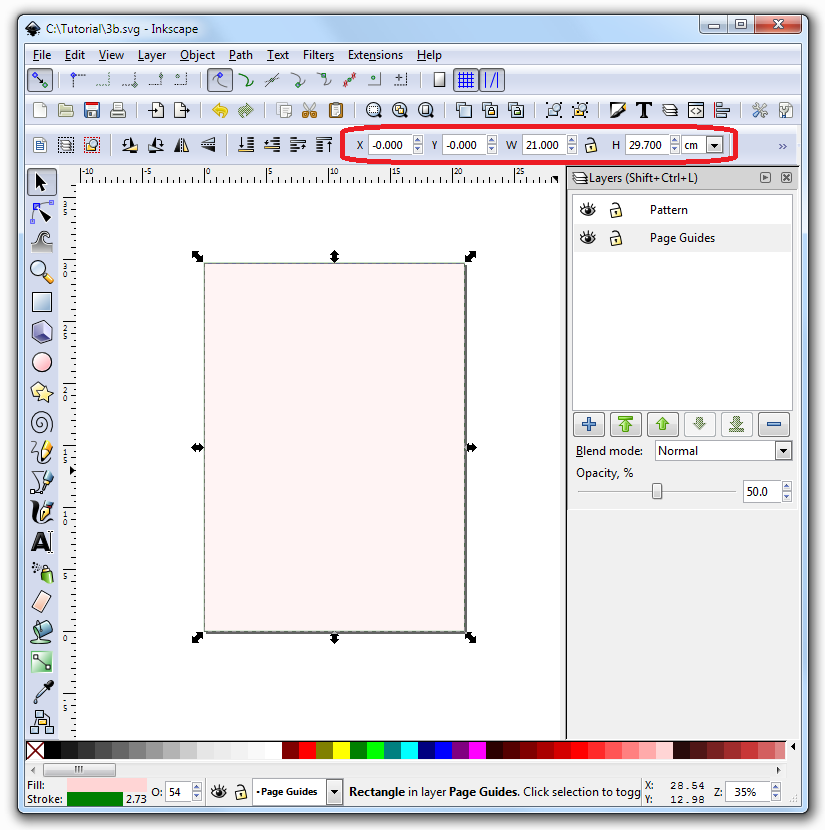
In this screenshot you can see we have created a shape using the rectangle tool and given it a fill colour. We have also set the Opacity of the layer to 50% - this will just allow us partially see through the shapes in case we have anything behind them. We also set the shape's opacity to 50% so we can see how they overlap. However, the colour and opacity doesn't actually matter as this object won't be visible on the final PDF.
Next we need to make this object the exact size of our page (that we noted in step 1). Do this by setting the values directly as shown below. Set the X and Y position to zero. Your page guide will exactly match the page.
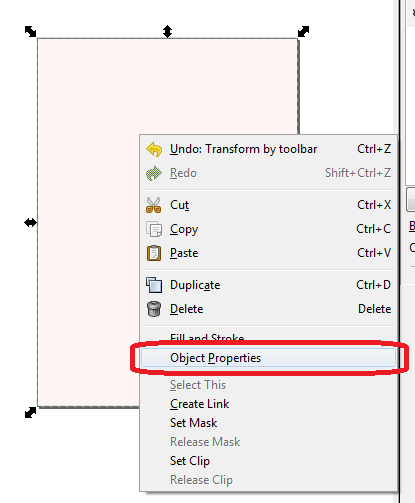
The final step in creating the first page guide is to set its ID. This is very important to get exactly right as this is how the program knows it is a page guide. To set the ID. To do this, right-click on the rectangle and select Object Properties.
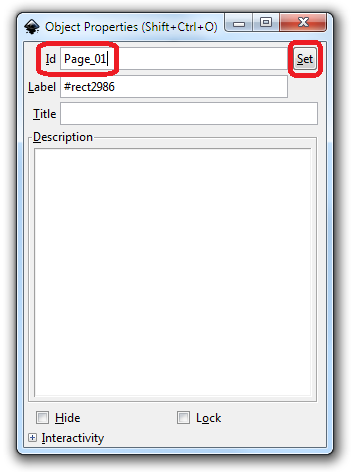
In the pop-up windows, set the ID to Page_01. You must click the Set button for the change to take effect. The pages of the PDF will be ordered based on these page guides. Anything starting Page_ (Page followed by an underscore) is considered a page guides. Anything can come after the underscore, but the pages will be ordered in alphabetical order so it is recommended to name them Page_01, Page_02 etc.
Step 4 - Create Other Page Guides
For every page you want to export, duplicate the first page guide and place it in the correct place. I recommend offsetting each page by 19cm (7.5") in the X direction and 25.4cm (10") in the Y direction. This causes each page to overlap a suitable amount for the inner border.
Remember that for each page guide you need to set its ID to Page_xx where xx is the page number it will be exported on.
If you have pages that don't need to be joined together then the pages don't need to overlap. For example here we have two separate pages on the left that will have self-contained pattern pieces on and 6 pages on the right that will have one big pattern piece.
Also, the position of Inkscape's "Page" is not actually important. In the above example it is one of the middle pages, but it could be off to one side or anywhere. It is only the position of the page guides that determine where the page will be exported from.
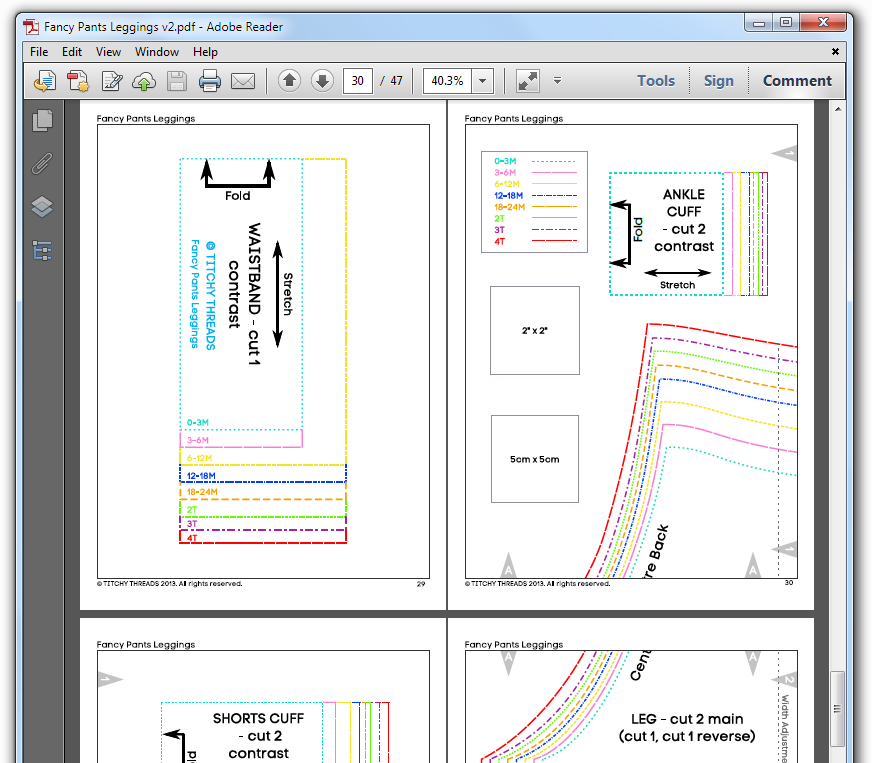
Below are some example SVG files with Page Guides, Border, and Page Numbers already set up for you:
Step 5 - Create Your Pattern
This step is up to you! Draw the pattern over the page guides on the Pattern layer. You can hide the Page Guides layer if the page guides start to get in the way. If you already have the pattern in another Inkscape file you can cut and paste it in. It is important that your pattern shapes are on the Pattern layer.
Step 6 - Create The Border
We are almost ready to export. However - because we want to support US and International users we have overlapped our pages. This means we need to add a border to hide the parts of the pattern near the edges of each page so it is easy to know where they join the next page. The size of this border is half the overlap between the page guides.
Using either A4 or US Letter page sizes and the overlaps given above, a good inner border size is 19cm (7.5") by 25.4cm (10"). The examples above contain a border this size for you to cut and paste as a starting point. TIP: To make a border create two rectangles - one for the outer (size of the page, positioned at 0,0) and one for the inner (size given above, aligned to the center of the outer one). Then select them both and click Path->Difference from the menu to combine them into one path object.
To set this up your border should be on a new layer above the others called Template.
Actually, the name does not matter as long as it doesn't start with the word Pattern. This is because any objects on a layer that does not start with the word Pattern will appear on every page in the location it is on the default Inkscape page. This allows us to define shapes, paths and text that appears on every page in the same place; the only criteria is that it is on a layer that is visible (usually above the pattern layer) and does not start with the word Pattern.
Zooming in and turning on the Pattern layer you can see how this looks:

Here I have also added diamond shaped objects with letters and numbers to indicate how the pages join up. These are positioned on the Pattern layer (or a new layer starting with the word Pattern for convenience) and lined up in the very middle of the overlap between pages. The exact co-ordinates of the diamonds will depend on the size of your shapes
Now your file is ready to export as a single PDF.
Exporting as a single PDF
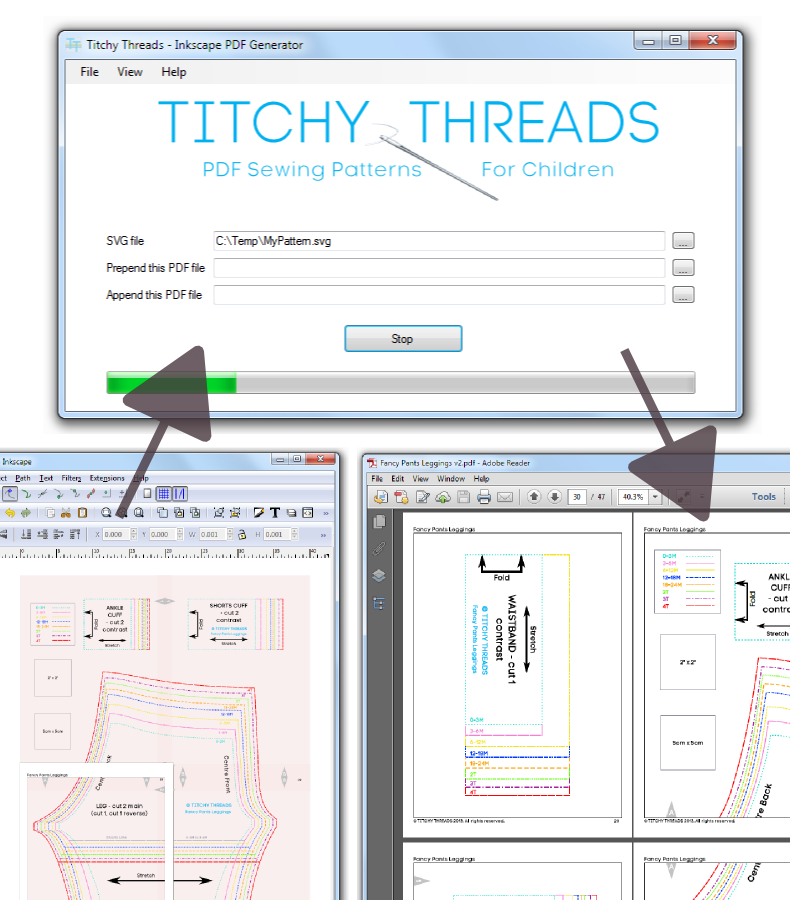
Launch Inkscape PDF Generator from the Start Menu. Inkscape needs to be installed on your computer, but it doesn't matter if it is currently running or not. The program works on the saved SVG file (without changing it) so it is fine if the SVG is open in Inkscape - just make sure that you have saved the latest version.
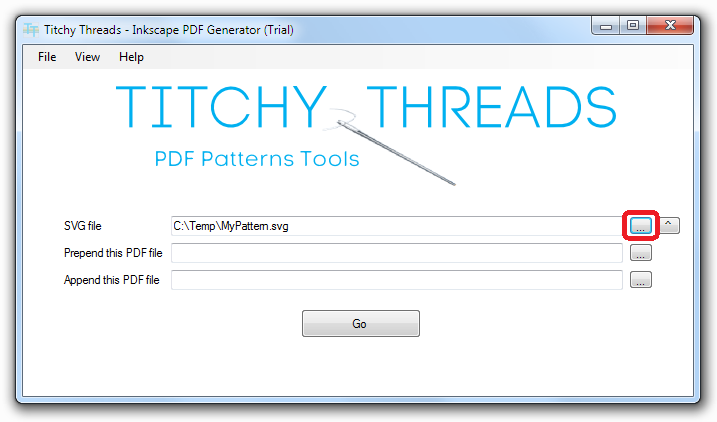
Enter the path and filename of your SVG file. You can click the button to the right to select it in a file dialog box. The button with the ^ symbol next to it opens the file in Inkscape.
If you want to prepend another PDF to the start of the document (for example a tutorial) or append another PDF to the end (for example an appendix) then enter these in the boxes below.
Now, all you have to do is click Go. A progress bar will indicate progress as each page is exported.
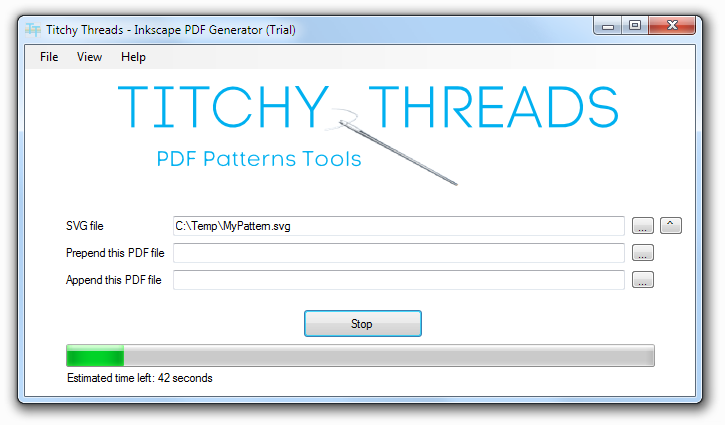
When the program completes, your PDF will be created in the same directory as the SVG file.

It will also be automatically opened in your default PDF reader.
Purchase Inkscape PDF Generator from Titchy Threads
Advanced topics
Page numbers
If your page numbers are within the middle of the border then you can just add them to one of the pattern layers like any other part of the pattern. However, if you want your page numbers to be on top of the border area then it is a bit more complicated. This is because each page number must only be visible on one page but occupies the overlapping area between two pages. There are two ways to do this:
Automatic Page Numbers
This is the easiest way - it was added in version 1.3.1.0 so please download the latest version if you have an older version.
To use automatic page numbers. First create a text object on the template layer where you want the page number to appear. Set the ID of the object to PageNumbers. Next, in the PDF generator program, select Document Properties and then the Page Numbers tab. Change the radio button to Automatic Page Numbers. The Text Object Name matches the ID you set in the SVG file. Now, when you generate the PDF, the text object will be set to the current page number (even taking into account any prepended PDF).
Manual Page Numbers
This is more effort but is still supported for backward compatibility.
Each page number object must have an ID of PageNumber_xx where xx matches the ID of the page guide for the page it appears on. For example, the page number that appears on Page_01 has an ID of PageNumber_01.
The page numbers will need to be on their own layer above the Template layer that contains the border. This layer must start with the word Pattern, for example Pattern Top. The page numbers need to be positioned as if they were part of the pattern. However, they will all be hidden during export except for the one that matches the currently exporting page. It does not matter if this layer is visible or not when you run the export as all layers starting with the word Pattern will be made visible by the export.
PDF Layers
To export layers from Inkscape using this tool you need to own the Professional License.
PDFs can have layers that allow you to turn on only the pattern pieces for the size you want to print. All our paid patterns use this feature. See here for more details.
First you need to tell the program which paths are on which layers. Note that the layers in Inkscape do not map to the PDF layers. This is because while working on the pattern in Inkscape you often want to group the pattern pieces together and when you do that they all end up on the same Inkscape layer.
So, this is done by setting the ID of the path to be Layer:layername:anything. The ID must start with the word Layer, then a colon, then the name of the layer (all paths with the same name are on the same layer), then a colon, then anything (such as the original path name). For example: Layer:0-3M:path4537
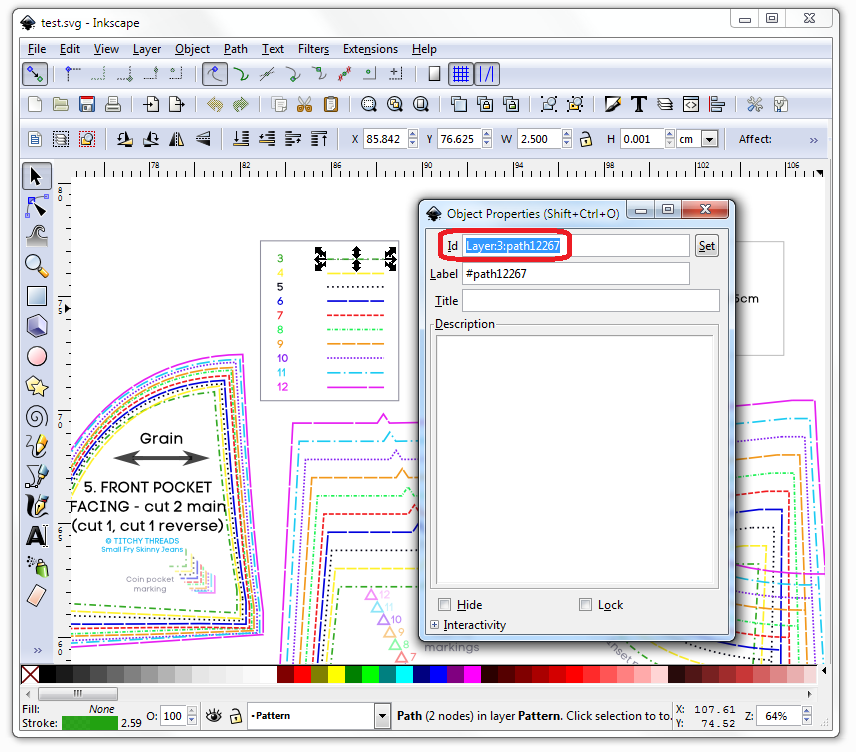
However, you don't need to do this for every single pattern piece; Any other path with the same stroke or fill colour as a path set to be on a layer will also be on that layer. In the above example we have only set the layer names on the paths in the size key - all the pattern pieces are then automatically included in that layer based on their colour.
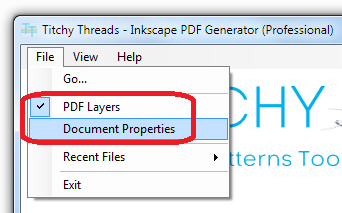
Back in Inkscape PDF Generator, turn on PDF Layers in the file menu. Generating PDF layers takes longer (a PDF with 8 layers will take 8 times longer to generate), so it is possible to toggle this on and off temporarily here.
Then click on Document Properties. As this edits the SVG file you will be prompted to close Inkscape first if it has the file open. In this window you can drag and drop the layers you defined to set the order they appear in the final PDF. You can also see which colours have been assigned to which layers.
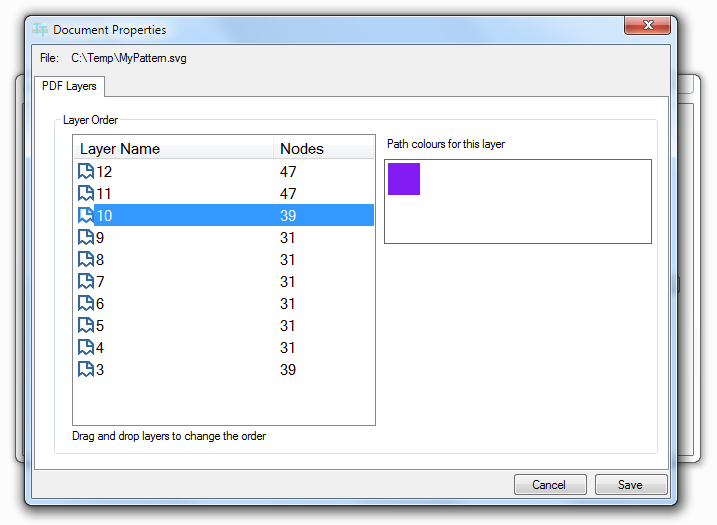
Click Save to save the changes to the SVG file.
Now running the generator will create PDF layers in the final document.
Purchase Inkscape PDF Generator from Titchy Threads
How to report a bug
To report a bug, please email support@titchythreads.com. Please include details of the problem and the log file (select View, Show Log from the menu and then cut and paste from the log that appears). It may also be helpful to include your SVG file. If you do, we will not keep the file after diagnosing the problem.